
Building a Jekyll Blog as lazily as possible
Many software developers have a personal blog that acts as something of a portfolio of the things they’ve worked on, researched or merely learned. What I am going to talk about is Jekyll and Github-Pages, two lovely pieces of technology which allowed me to put this little blog of my own together with the minimum effort possible.
Now before I get into detail; yes, “lazily” and “minimum effort possible” are perhaps not terms you want to be reading if you’re trying to appraise the value and behavioural habits of a Software Developer. However in this case I use the terms not to imply that I’ve avoided putting care and attention into the creation of the blog, but rather to indicate a preference towards more efficient and effective solutions when pragmatically appropriate.
In this case pragmatism speaks to the fact that while I am fully capable of fancy, frameworked front-end development, I don’t derive any particular enjoyment from it like I do with other developmental tasks. As such, the pragmatic path to facilitate me writing posts about the things I have a passion for, is to get this blog online as efficiently possible.
I suppose this is something of a moot point, since I do find some joy in finding efficient and effective approaches to problems, so I somehow found my itch scratched despite the task at hand.
Finally, the Jekyll stuff
In any case, you’re probably not here to listen to me talk about myself, so lets talk about Jekyll!
Jekyll is a Ruby Gem written with the express goal of minimizing the difficulty involved in writing and maintaining a blog by automating various aspects of common blog design and management, as well as providing a fairly simple and straightforward environment with which to apply blog themes kindly offered by the open-source community. (The link to the theme powering my blog in particular is present in the footer of this page.)
As far as it’s goal goes, it beats the mark quite substantially. Like all Ruby Gem’s, installation and creation of your very own Jekyll project is a simple as running the following in your terminal, provided you have a reasonably modern version of Ruby available within your development environment.
gem install jekyll && jekyll new <your_blog_name>
Likely your output from the jekyll new command will look something like this:
➜  jekyll new test
Running bundle install in /home/gregory/Projects/test...
  Bundler: Fetching gem metadata from https://rubygems.org/..........
  Bundler: Fetching gem metadata from https://rubygems.org/.
  Bundler: Resolving dependencies...
  Bundler: Using public_suffix 4.0.5
  Bundler: Using addressable 2.7.0
  Bundler: Using bundler 2.0.1
  Bundler: Using colorator 1.1.0
  Bundler: Using concurrent-ruby 1.1.7
  Bundler: Using eventmachine 1.2.7
  Bundler: Using http_parser.rb 0.6.0
  Bundler: Using em-websocket 0.5.1
  Bundler: Using ffi 1.13.1
  Bundler: Using forwardable-extended 2.6.0
  Bundler: Using i18n 0.9.5
  Bundler: Using rb-fsevent 0.10.4
  Bundler: Using rb-inotify 0.10.1
  Bundler: Using sass-listen 4.0.0
  Bundler: Using sass 3.7.4
  Bundler: Using jekyll-sass-converter 1.5.2
  Bundler: Using listen 3.2.1
  Bundler: Using jekyll-watch 2.2.1
  Bundler: Using kramdown 1.17.0
  Bundler: Using liquid 4.0.3
  Bundler: Using mercenary 0.3.6
  Bundler: Using pathutil 0.16.2
  Bundler: Using rouge 3.22.0
  Bundler: Using safe_yaml 1.0.5
  Bundler: Using jekyll 3.8.7
  Bundler: Using jekyll-feed 0.15.0
  Bundler: Using jekyll-seo-tag 2.6.1
  Bundler: Using minima 2.5.1
  Bundler: Bundle complete! 6 Gemfile dependencies, 28 gems now installed.
  Bundler: Use `bundle info [gemname]` to see where a bundled gem is installed.
New jekyll site installed in /home/gregory/Projects/test.
➜  cd test
➜  ls
404.html  about.md  _config.yml  Gemfile  Gemfile.lock  index.md  _posts
➜  ls _posts
2020-08-16-welcome-to-jekyll.markdown
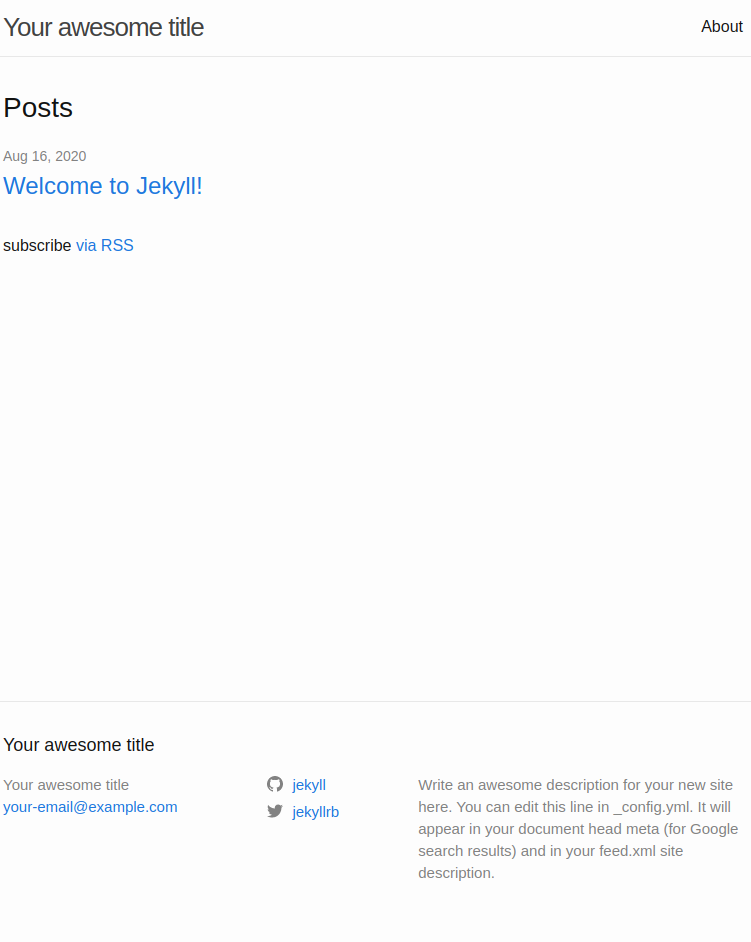
Congrats, you have a Jekyll blog! Well done! Lets knock off, head to the pub and share a pint in celebration! All you need to do is start it:
➜ jekyll s
Configuration file: /home/gregory/Projects/test/_config.yml
            Source: /home/gregory/Projects/test
       Destination: /home/gregory/Projects/test/_site
 Incremental build: disabled. Enable with --incremental
      Generating...
       Jekyll Feed: Generating feed for posts
                    done in 0.505 seconds.
 Auto-regeneration: enabled for '/home/gregory/Projects/test'
    Server address: http://127.0.0.1:4000/
  Server running... press ctrl-c to stop.
Okay, okay, odds are good you’re fully aware I’m being full of nonsense and that, unfortunately, nothing is that simple. (As much as us lazy developers wish otherwise…)
Now that we’ve had our reality check, lets get on with actually turning our initial generated jekyll template into an actual blog. Naturally, nothing beats the actual documentation which is likely to be updated in the long term unlike this blog post, so you can find that here.
The lazyiest way to make the blog your own
First and foremost, as clean as the default aesthetic is, you’re undoubtedly in the mood to show off your creative flare and make sure your blog effectively mirrors your sunshiny disposition and meticulous attention to design and detail… or, like me, you just don’t want to burn your readers eyeballs out while being minimally offensive from a design perspective.
The following is the default configuration for Jekyll generated by the jekyll new command. The is essentially the central configuration underpinning the entire Jekyll blog. The blog’s title, url and it’s wonderful, skillful and not at all lazy author are all detailed in here, in addition to various other interesting configurations, including those specific to the theme you apply to your blog.
# Welcome to Jekyll!
#
# This config file is meant for settings that affect your whole blog, values
# which you are expected to set up once and rarely edit after that. If you find
# yourself editing this file very often, consider using Jekyll's data files
# feature for the data you need to update frequently.
#
# For technical reasons, this file is *NOT* reloaded automatically when you use
# 'bundle exec jekyll serve'. If you change this file, please restart the server process.

# Site settings
# These are used to personalize your new site. If you look in the HTML files,
# you will see them accessed via Havenga.dev, your-email@example.com, and so on.
# You can create any custom variable you would like, and they will be accessible
# in the templates via .
title: Your awesome title
email: your-email@example.com
description: >- # this means to ignore newlines until "baseurl:"
  Write an awesome description for your new site here. You can edit this
  line in _config.yml. It will appear in your document head meta (for
  Google search results) and in your feed.xml site description.
baseurl: "" # the subpath of your site, e.g. /blog
url: "" # the base hostname & protocol for your site, e.g. http://example.com
twitter_username: jekyllrb
github_username:  jekyll

# Build settings
markdown: kramdown
theme: minima
plugins:
  - jekyll-feed

# Exclude from processing.
# The following items will not be processed, by default. Create a custom list
# to override the default setting.
# exclude:
#   - Gemfile
#   - Gemfile.lock
#   - node_modules
#   - vendor/bundle/
#   - vendor/cache/
#   - vendor/gems/
#   - vendor/ruby/
You’ll notice the config contains a line written “theme: minima”, which applies the “minima” theme to your blog, no extra steps required. Changing the theme is simply a matter of making sure the theme files are available and then modifying this particular configuration. There’s a variety of wonderful open source themes to view and choose from, as well as details about how to make sure your gem based themes are available to your blog, all mentioned in the Jekyll theme documentation here
No Minimum effort prettiness
Of course, if you’re feeling the itch of laziness, then what you’ll be particularly interested in is this one subtle bit of configuration in the _config.yml for this very blog (at the time of writing at any case):
remote_theme: "mmistakes/minimal-mistakes@4.20.1"The remote_theme configuration lets you, for specific themes that have been apropriately configured on Github to be supported, let you set them as your blogs chosen theme using this option, and then do literally nothing else in your pursuit of laziness efficiency. Job’s done and your blog suddenly looks magically different give or take a few configuration tweaks specific to the theme you chose.
Make sure to at least glance over the documentation for your theme since, for example, the minimal-mistakes theme in particular requires the default layout of your pages to be changed in order for them to be able to be pre-rendered by Jekyll.
From there, just a little config and you’re all set. Most of the themes including some magical logic that can use information provided in your _config.yml to populate all manner of fancy presentational details for you without you needing to write any HTML or CSS, such as the author sidebar with my handsome mug.
Deployment time… Oh no.
Yep, now we actually have to put this puppy on the internet! Easy right? Maybe you could spool up a Heroku app, push your blog over to there and present it just like that? Or you could purchase a server or compute instance from some provider like AWS, scp your code over to it and turn the ignition to immediate developer blogging success!
Orrrrrrrrrrr, if you’ve put as much effort into building this blog as I have, these still sound like too much work. Luckily for us, Github Pages is a thing.
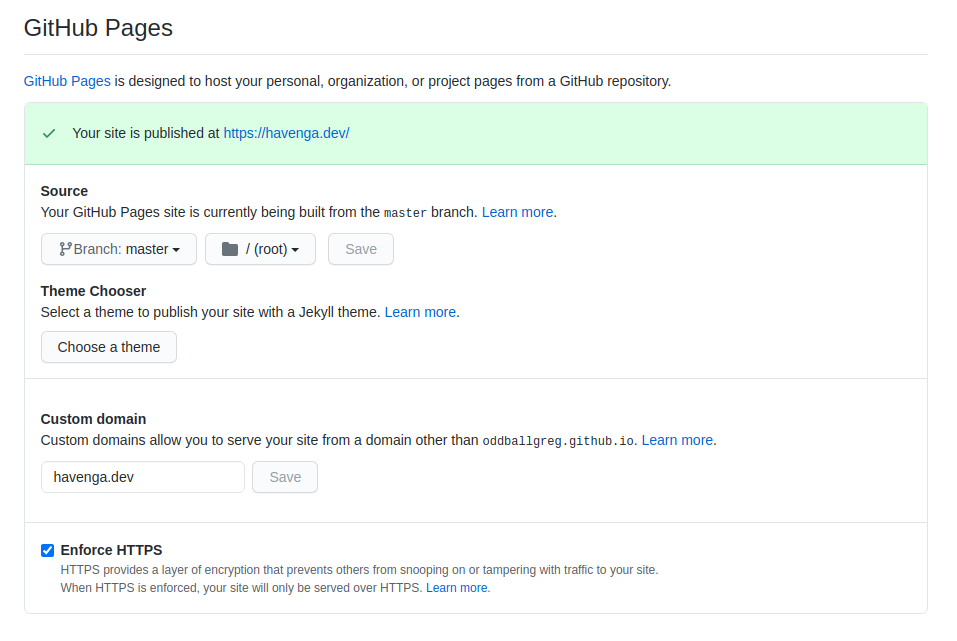
Github Pages is an awesome little bit of functionality provided by Github to serve some perhaps not-very-basic informational webpages directly from the Github repository. In the case of this blog, this repository is found at https://github.com/OddballGreg/oddballgreg.github.io, which translates to the blog being hosted at https://oddballgreg.github.io by Github Pages.
You might notice that’s not the URL you’re at right now. I’d picked up havenga.dev at a good price from Namecheap a while back when I first thought about writing a dev blog, and after a day of learning to understand what on earth ANAME and CNAME records are, as well as a variety of other DNS related tidbits, set that domain to permanently redirect to the Github Pages url for this blog.
You’ll need to enable the Github Pages functionality (and inform Github of your desire to use your own URL if you care to) on the primary settings page of your repository. Make sure to enable HTTPS as well since, well, there’s really no reason your web assets shouldn’t be using HTTPS in this day and age. Your account will need to be verified and a few extra details filled in before GitHub will let you finish this configuration.
Next up; the following is the “Gemfile” for this blog. One of these is automatically generated by the jekyll new command, though it’s not unique to blogs, or even web applications. Gemfiles are essentially Ruby’s way of performing dependency management. By listing the gems you want to use in your application and setting their specific versions as desired, you can effectively manage the dependencies and their versions that you expect to use when running the ruby application. Running the ruby command bundle in a modern ruby version (or installing it via gem install in an older one first) will then trigger “bundler” to resolve the dependency requirements of each gem listed in the Gemfile to make sure that none of the dependencies have mutually exclusive requirements; before writing the final set of resolved and agreed dependency versions to the “Gemfile.lock” file. Provided you commit this file to your source control, it provides you with a relatively strong assurance that anyone running the Ruby project will be doing so with same dependencies.
source "https://rubygems.org"

# Hello! This is where you manage which Jekyll version is used to run.
# When you want to use a different version, change it below, save the
# file and run `bundle install`. Run Jekyll with `bundle exec`, like so:
#
#     bundle exec jekyll serve
#
# This will help ensure the proper Jekyll version is running.
# Happy Jekylling!
# gem "jekyll", "~> 3.8.6"

# If you want to use GitHub Pages, remove the "gem "jekyll"" above and
# uncomment the line below. To upgrade, run `bundle update github-pages`.
gem "github-pages", group: :jekyll_plugins
gem 'faraday', '0.17.3'
gem "jekyll-github-metadata"
gem 'jekyll-include-cache'

# If you have any plugins, put them here!
group :jekyll_plugins do
  gem "jekyll-feed", "~> 0.6"
end

# Windows does not include zoneinfo files, so bundle the tzinfo-data gem
# and associated library.
install_if -> { RUBY_PLATFORM =~ %r!mingw|mswin|java! } do
  gem "tzinfo", "~> 1.2"
  gem "tzinfo-data"
end

# Performance-booster for watching directories on Windows
gem "wdm", "~> 0.1.0", :install_if => Gem.win_platform?
Longwinded explanation aside, the only thing your really need to care about is that for Github Pages to work with your Jekyll blog, you need to add the github-pages gem as a dependecy for the application, and then run bundle to resolve a version for it.
gem "github-pages", group: :jekyll_pluginsProvided all has gone well, you should be all set to push your code to it’s Github repository now and set off to demonstrate your programming prowess to the world.
All Done!
Erh, not really. You realize you still have to actually write some content for the blog now right? Maybe a dry attempt at humorously describing how lazy Jekyll and Github Pages let you be while setting up your blog?
In any case, I recommend taking it easy, putting on some calming music or YouTube video game playthroughs you don’t actually care to pay too much attention to, and just have fun with it. Having written for a blog every day for 2 years in my past, I can assure you, it’s all too easy to stress yourself out by applying too much pressure when it’s unneeded… kind’ve like trying to make a professional blog right off the bat when almost no-one is likely to be reading it in the beginning anyways.